Twitch
Creating a custom Twitch OAuth application
The step-by-step instructions below follow Twitch's documentation on Using OAuth 2.0 for authentication.
Create credentials for ngrok
Navigate to the Twitch developer console, sign in, click Applications on the left menu, and then click Register Your Application.
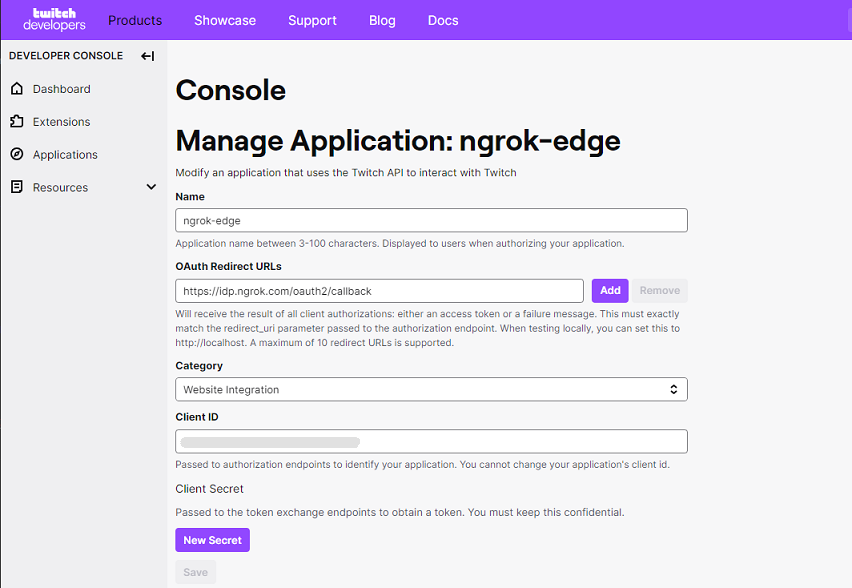
On the Register Your Application page, provide a Name for your application, enter
https://idp.ngrok.com/oauth2/callbackin the OAuth Redirect URLs field, select Website Integration in the Category selector, and then click Create.Note: Make sure you have two-factor authentication enabled for your Twitch account.
On the Developer Applications page, click Manage for your application.
On the application page, click New Secret, and make a note of the Client ID and Client Secret values.

Update your endpoint configuration
Access the ngrok Dashboard, sign in, create or edit an edge, and click OAuth to enable the OAuth configuration.
Select Twitch in the Identity Provider selector, and select Use my own OAuth application in the OAuth Application field.
Note: Alternatively, you can select Use an ngrok-managed OAuth application. If so, there is no need to create an application in the Twitch developer console.
Enter the Client ID and Client Secret values you copied previously in the corresponding fields and then click Save to save the edge configuration.
Access your application using the link provided by the Endpoints URL of your edge.